Even though the basic ideas behind gas metal arc welding (GMAW) haven’t changed in the past 70 years, the equipment, alloys, and technology used to make the arc have and continue to change. Even though these changes have made things easier, especially for new welders, there is still a lot to know about GMAW in order to do it well.
There are many things that go into making a good weld, so the more you know about the base metal, consumables, weld parameters, torch angle, and travel speed, the more likely it is that you’ll be able to make a good weld every time.
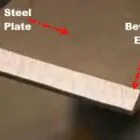
Find out the base material
The base metal is the best place for new welders to start. Important things to think about are the type of material, the thickness, and whether or not the metal is coated. The way the machine is set up, the type of filler metal, the shielding gas, and even which welding process to use will all affect the weld. Basically, everything starts with the building blocks. One of the most common things you might see is a fillet weld on mild steel. This article will show how to do this simple weld as an example.
Make sure your base material is ready to go. Some new welders skip this step because it takes time, but it’s important for getting the best weld possible.
First, use a degreaser or solvent to wipe down the surface.
Using a wire brush or grinder, keep cleaning the material to get rid of any dirt on the surface until the metal is clean.
Check the fit to make sure there aren’t too many gaps or that they are all the same size.
For GMAW to work, the machine needs a constant-voltage power supply set to direct-current electrode positive (DCEP). Some newer GMAW power sources are already set up this way, but if yours isn’t, you’ll need to change it to the right settings.
Choose a Metal Filler
After looking at the application, you need to choose a filler metal for GMAW. If you use the wrong wire, your weld might not be as strong as it could be, but how do you know which one works best? This choice will depend on how well the composition of the wire matches that of the base metal, how clean the metal is, and what kind of shielding gas will be used.
How thick the base material is will determine the size of the wire you choose. Going back to the fillet weld example with 14-gauge mild steel, ER70S-6 with a diameter between 0.035 and 0.045 is a likely choice. The ER70S-6, which is also called S6, has more silicon than the ER70S-3 (S3). This makes it easier to clean when it gets dirty or rusty. But because the silicon brings impurities to the surface, this wire may form more silicon islands after the weld. If the metal you are working with is clean, the S3 might be a better choice.
Note:
Another thing to think about when using wire is making sure that its cast and helix are right. Having trouble understanding? Well, if you take a piece of wire that’s maybe 2 feet long and throw it on the floor, the diameter of the circle it makes is the cast. The helix is the arc of a single strand of wire when it is flat, or how far it rises off a flat surface. Make sure your wire has a cast of at least 15 inches and a helix of less than 1 inch to make sure it feeds right. If you don’t do this, the wire may not always make contact with the inside of your torch. This can cause the contact tip to wear out early or even cause the arc to stop working, which will make you less productive.
Set the gas to protect
Depending on what you want to do, some gas mixtures are better than others. 90% argon and 10% carbon dioxide is a good mix for welding both mild and carbon steels. For the fillet weld example, this is the best mix. If you’re welding thin-gauge material at low power, a 75 percent argon/25 percent CO2 mix is cheaper and still gives you good adhesion without burning through. When welding aluminium, the best shielding gas is pure argon. Always know your options and how to use them.
Learn about the parameters of a weld
Before you put the torch to the metal in the GMAW, you need to set other welding parameters, such as the voltage and speed of the wire feed. These settings are important if you want to fine-tune your weld by hand. In older machines, for instance, you might have one knob for the speed (or power) of the wire feed and another for the voltage. Many of the new power sources have built-in programmes or synergic lines that change these variables based on how the arc acts. The link between the speed of the wire feed and the voltage is called “synergistic.” With these machines, you can change the voltage based on how fast the wire is fed by using a single knob or even a touch screen.
You can quickly change the parameters of synergic systems. Before you can change the parameters, you have to choose the welding process, the type of wire, the diameter of the wire, and the shielding gas. After the preselection is done, the wire feed speed is automatically changed to fit the application, which is often welding.
Once the wire feed speed is set, you can use the arc length correction or trim to change the voltage. Most of the time, a shorter arc length means a faster speed, but it could also cause more spatter. When you have a long arc length, you usually have to go slower, and even though there isn’t much spatter, you may have trouble with undercut. Most of the time, setting the parameters requires trial and error, but newer equipment that works well together can cut down on this time.
Know how to hold your torch
Now that all of the parameters are set, the next thing to decide is the angle of the torch. The push, or forehand, method heats the metal and moves the fluid weld pool in the direction of travel. This method lets you see where you’re going and gives you a low-profile bead. Afterall, the GMAW is about Arc.
A pull motion is when the torch is pointed back at the weld puddle and is pulled away from where the weld is being put down. This can make the bead taller or deeper and draws attention to where the weld was. When your gun is neutral, it is completely straight across from the seam.
Going back to our example of mild steel, either angle of the torch will work. Use the method that gives the best weld for the job. When welding aluminium, you should always use the push method. If you don’t, the decrease in shielding gas coverage that can happen with the pull method could cause your weld to have a lot of holes and sometimes even burn through.
Learn how to move quickly
Welding works best when you move quickly, but it can be hard to get the hang of. Keep in mind that your speed depends on how much amperage you set. If you are welding at a high amperage, you will need to move faster to keep from burning through the base metal. Low-amperage welding lowers the amount of heat going into the base material to keep it from warping. However, this can lead to weld defects like not fusing. Move more slowly to keep the weld puddle fluid and avoid fusion problems. Even on the most advanced machines, there is no way to adjust for how fast you move, so keep the distance between the contact tip and the work piece constant and watch the weld puddle solidify to make sure it is the same from start to finish.
Get the look and quality of beads you want
When it comes to how beads look, you have a few options. Use a whipping motion or a process that automatically changes the wire feed speed to make a bead that looks like a stack of dimes. Make sure the toes of the weld are the same size and shape to make a nice weave bead. A drawback of weaving is that it requires more heat, but if a larger weld bead is needed, weaving is a good way to do it.
In GMAW you should look at both the bead and the area around it, once you’re done welding. Is there a lack of uniformity, undercutting, cracking, or holes? If so, you need to look back at the choices you’ve made to figure out what went wrong and how to fix it.
Say, for example, you see a bit of undercut. This indicates us that the foundation material has been worn away. And that the weld pool did not completely fill the empty space. This can happen if the voltage is too high. Either the travel speed is too fast, or the wire feed speed is too slow. When you undercut a weld, the base material is thinner than the rest of the piece, creating a weak spot. The weakest part of the weld is the undercut, which is where the thinnest cross section is. This is where the weld is most likely to fail, either right away or over time. On the next weld, pay attention to the travel speed and voltage to keep from making more mistakes.
Final Words
If you use the right materials, machine settings, and techniques, your weld shouldn’t have any visible flaws. Flaws like cracks or holes and should be the same shape and size everywhere. But don’t just rely on these things you can see. Testing will show you multiple parameters. It will show the parameters you chose, the techniques you used, and your skill gave you a good weld. This will give you confidence that you are going in the right direction. You should know that you can handle any new welding job if you know what is to be done. And also what options you have. The basic principles of GMAW haven’t changed in recent years or should we say decade.